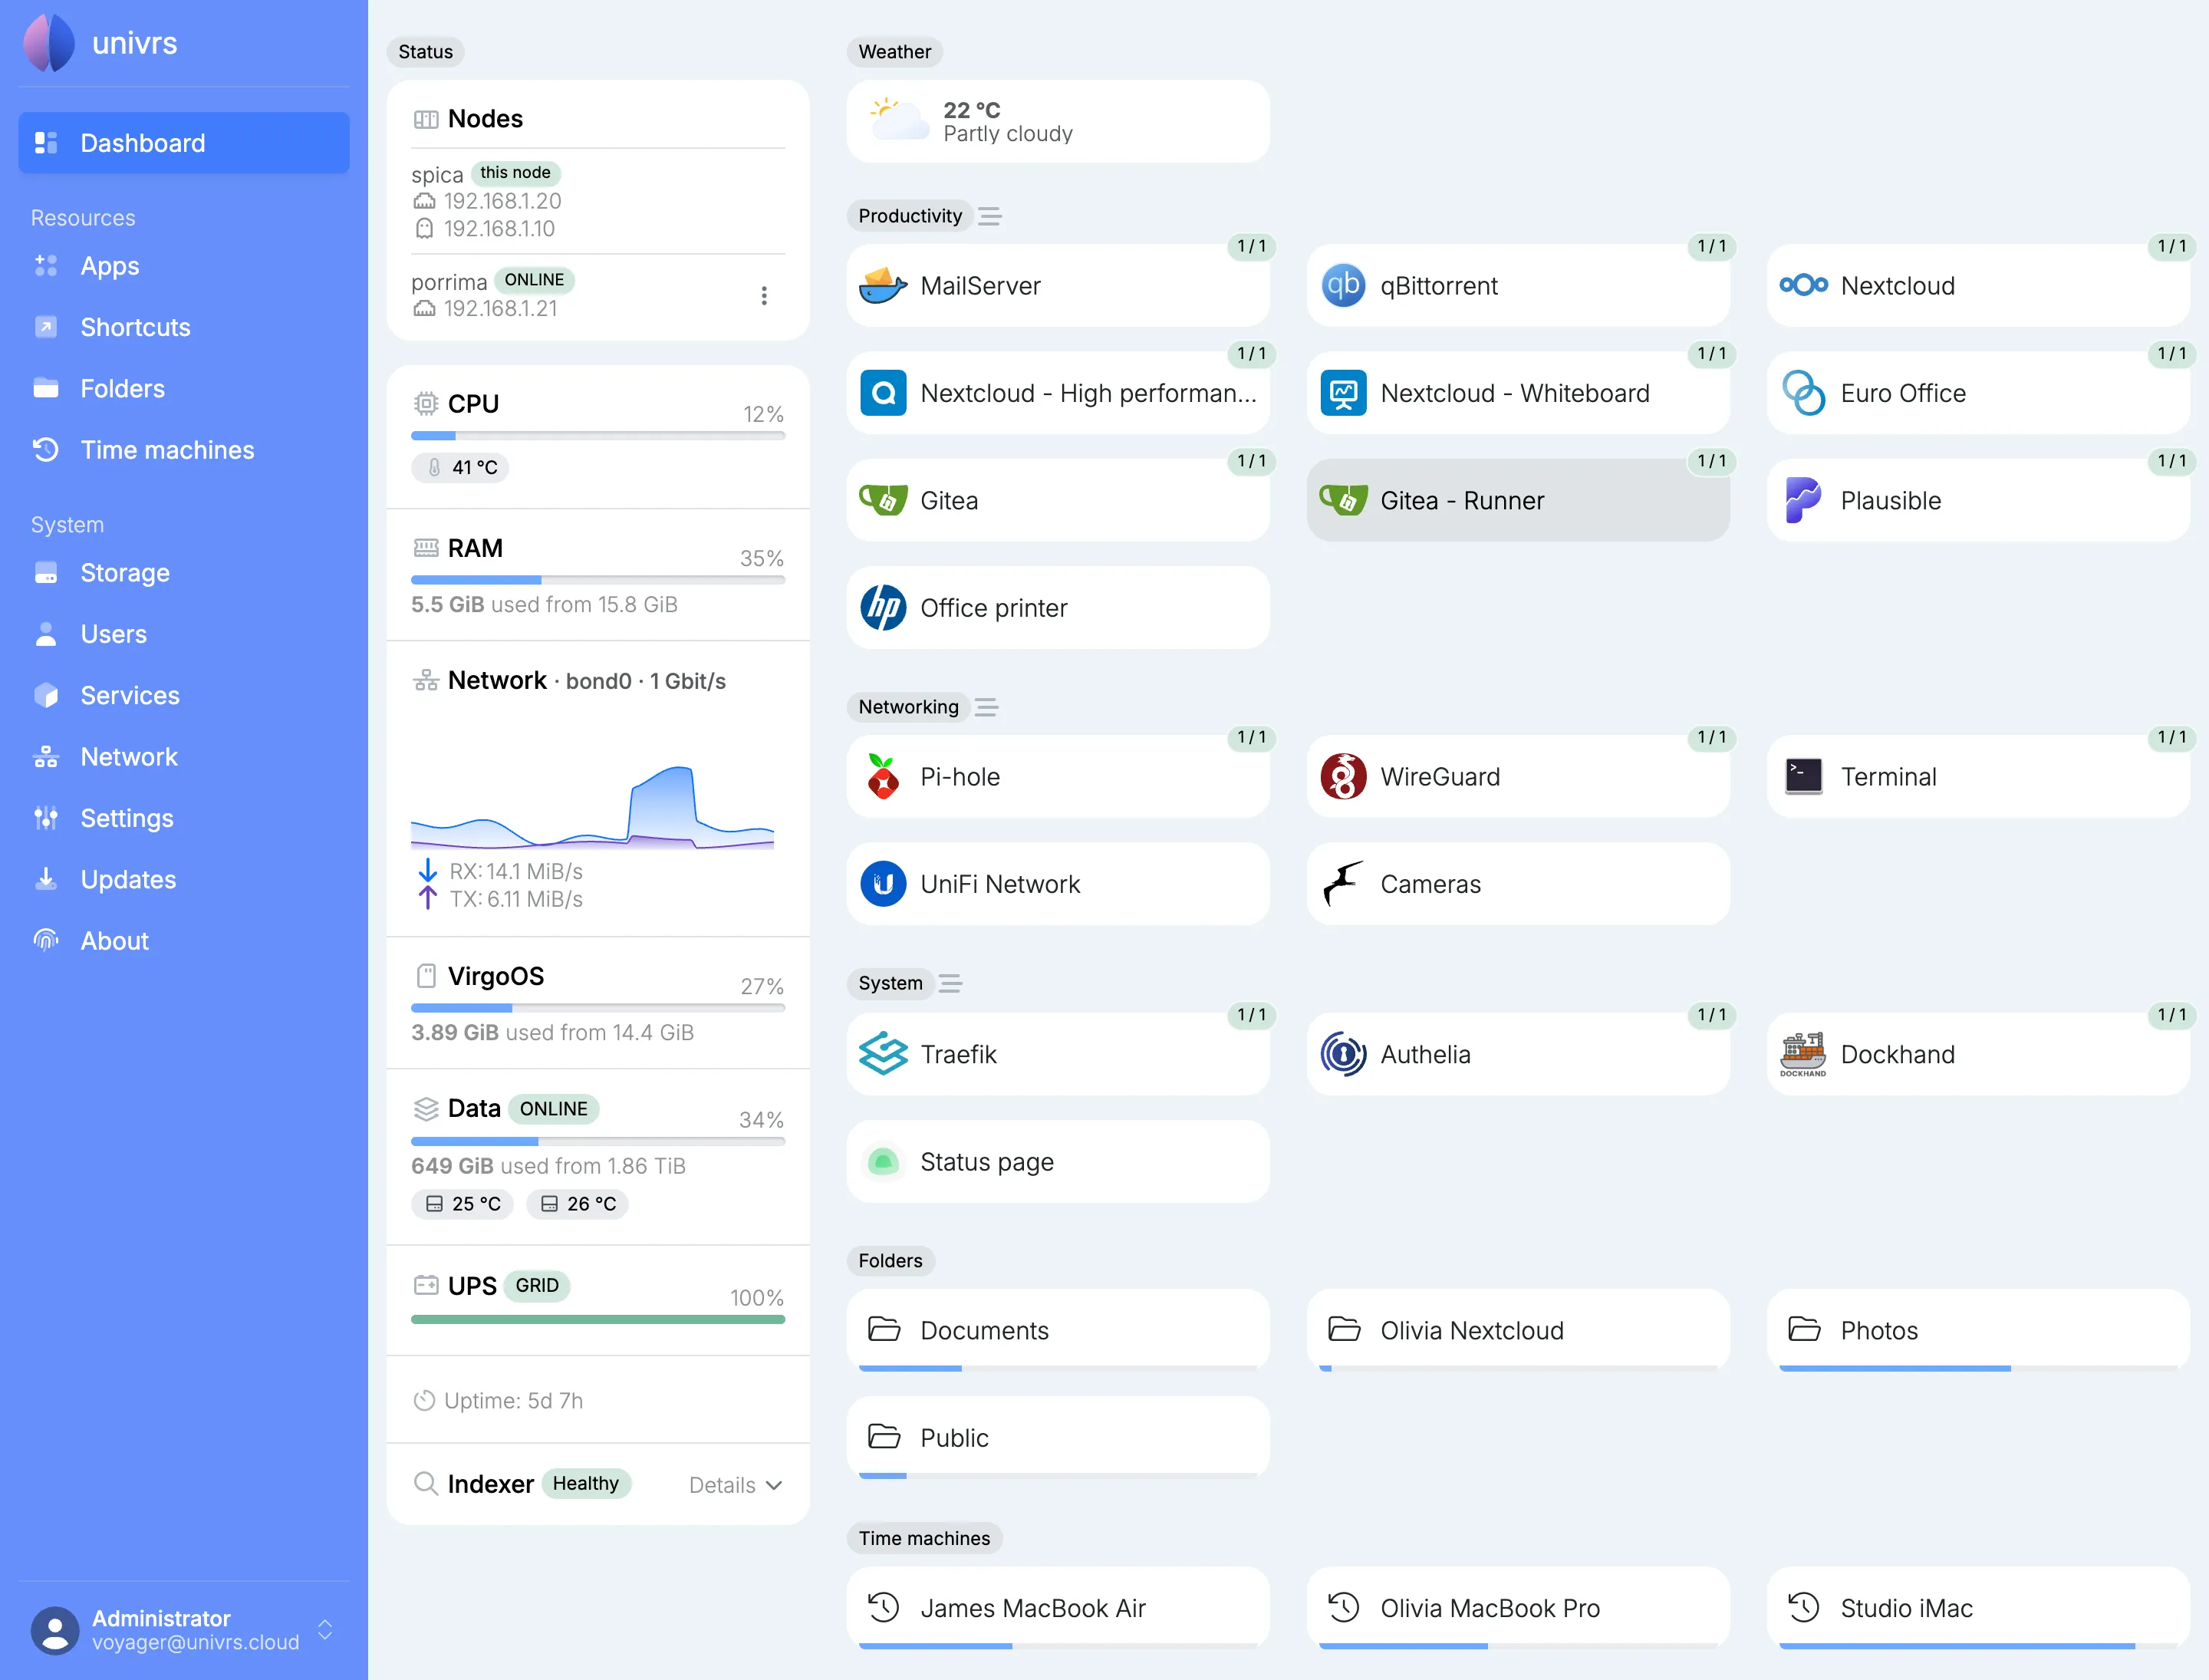
virgoOS is an operating system for one job: running your files, email and collaboration tools on a server you own, without someone having to administer that server by hand. All of it is open source.
A machine running virgoOS is called a node. This post walks through what a node does from the first time it starts.
Setup, once
The first time a node starts, it runs setup in a browser. Setup sets the network, creates the storage pool, registers the node with your fleet account, installs the core apps and replaces the factory password. When it finishes, you manage the node by signing in at its name, for example https://spica.virgo.univrs.cloud.
A node needs at least two data drives of the same size and at least 8 GB of RAM. The setup guide covers each step.
Storage that keeps a history
Everything lives on a redundant ZFS pool. Depending on how many drives the node has, setup offers layouts from a mirror to RAID-Z3, which survive between one and three drive failures.
The pool also keeps its own history. The node takes a snapshot for each of the last 36 hours, 30 days, 60 months and 5 years, and removes older ones by itself. A snapshot is a read-only copy of the data as it was at one moment, and it only takes up space for what has changed since.
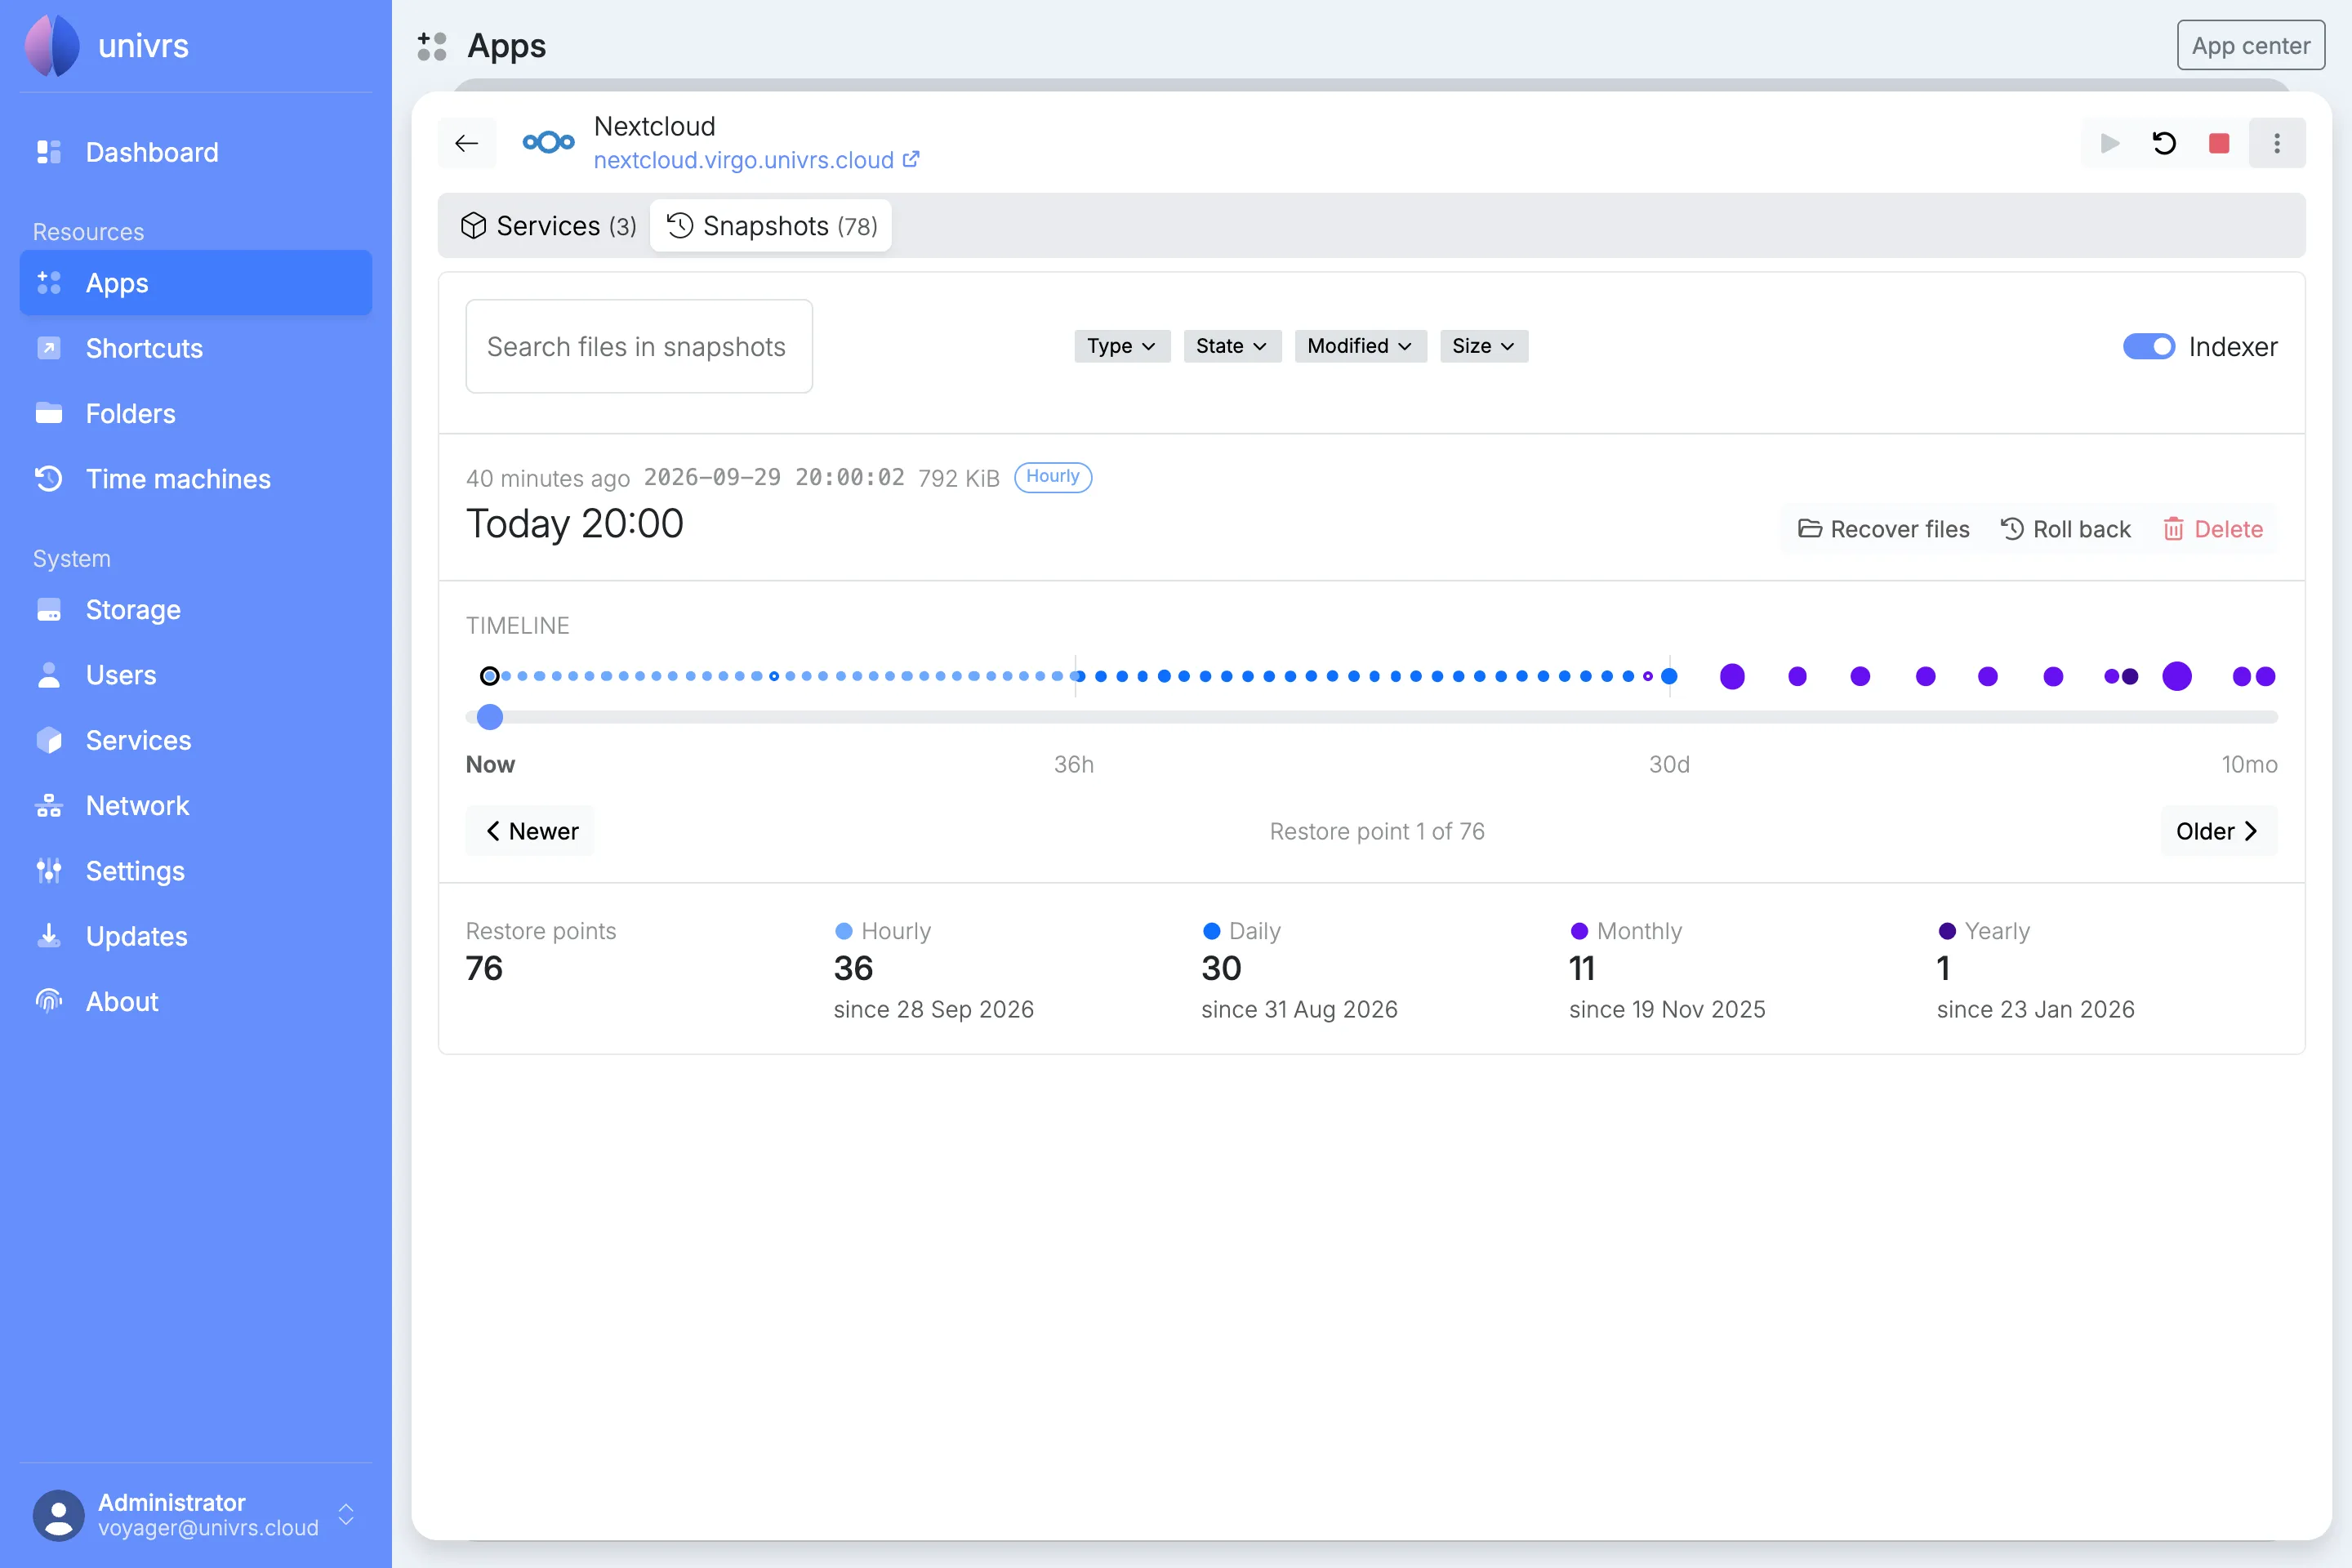
That history is what makes a deleted or encrypted file recoverable. The indexer catalogues the files in the snapshots every hour, so you can search for earlier and deleted versions of a file from an app’s snapshots, or from a terminal:
virgo indexer --helpOnce a month the pool reads all of its data back, checks it against its checksums and repairs anything that does not match.
Apps from the App center
Three core apps are installed during setup: Traefik, which routes requests to the apps and handles their SSL certificates, Authelia, which holds the node’s accounts, and a terminal in the browser.
Everything else comes from the App center:
- Nextcloud for files, with Euro Office for editing documents together, a high-performance backend for calls and a shared whiteboard.
- A mail server on your own domain, with spam and virus filtering.
- WireGuard for an encrypted connection from outside your network.
- Pi-hole to block ads and trackers for the whole network.
- Gitea, Plausible, qBittorrent and Dockhand for those who need them.
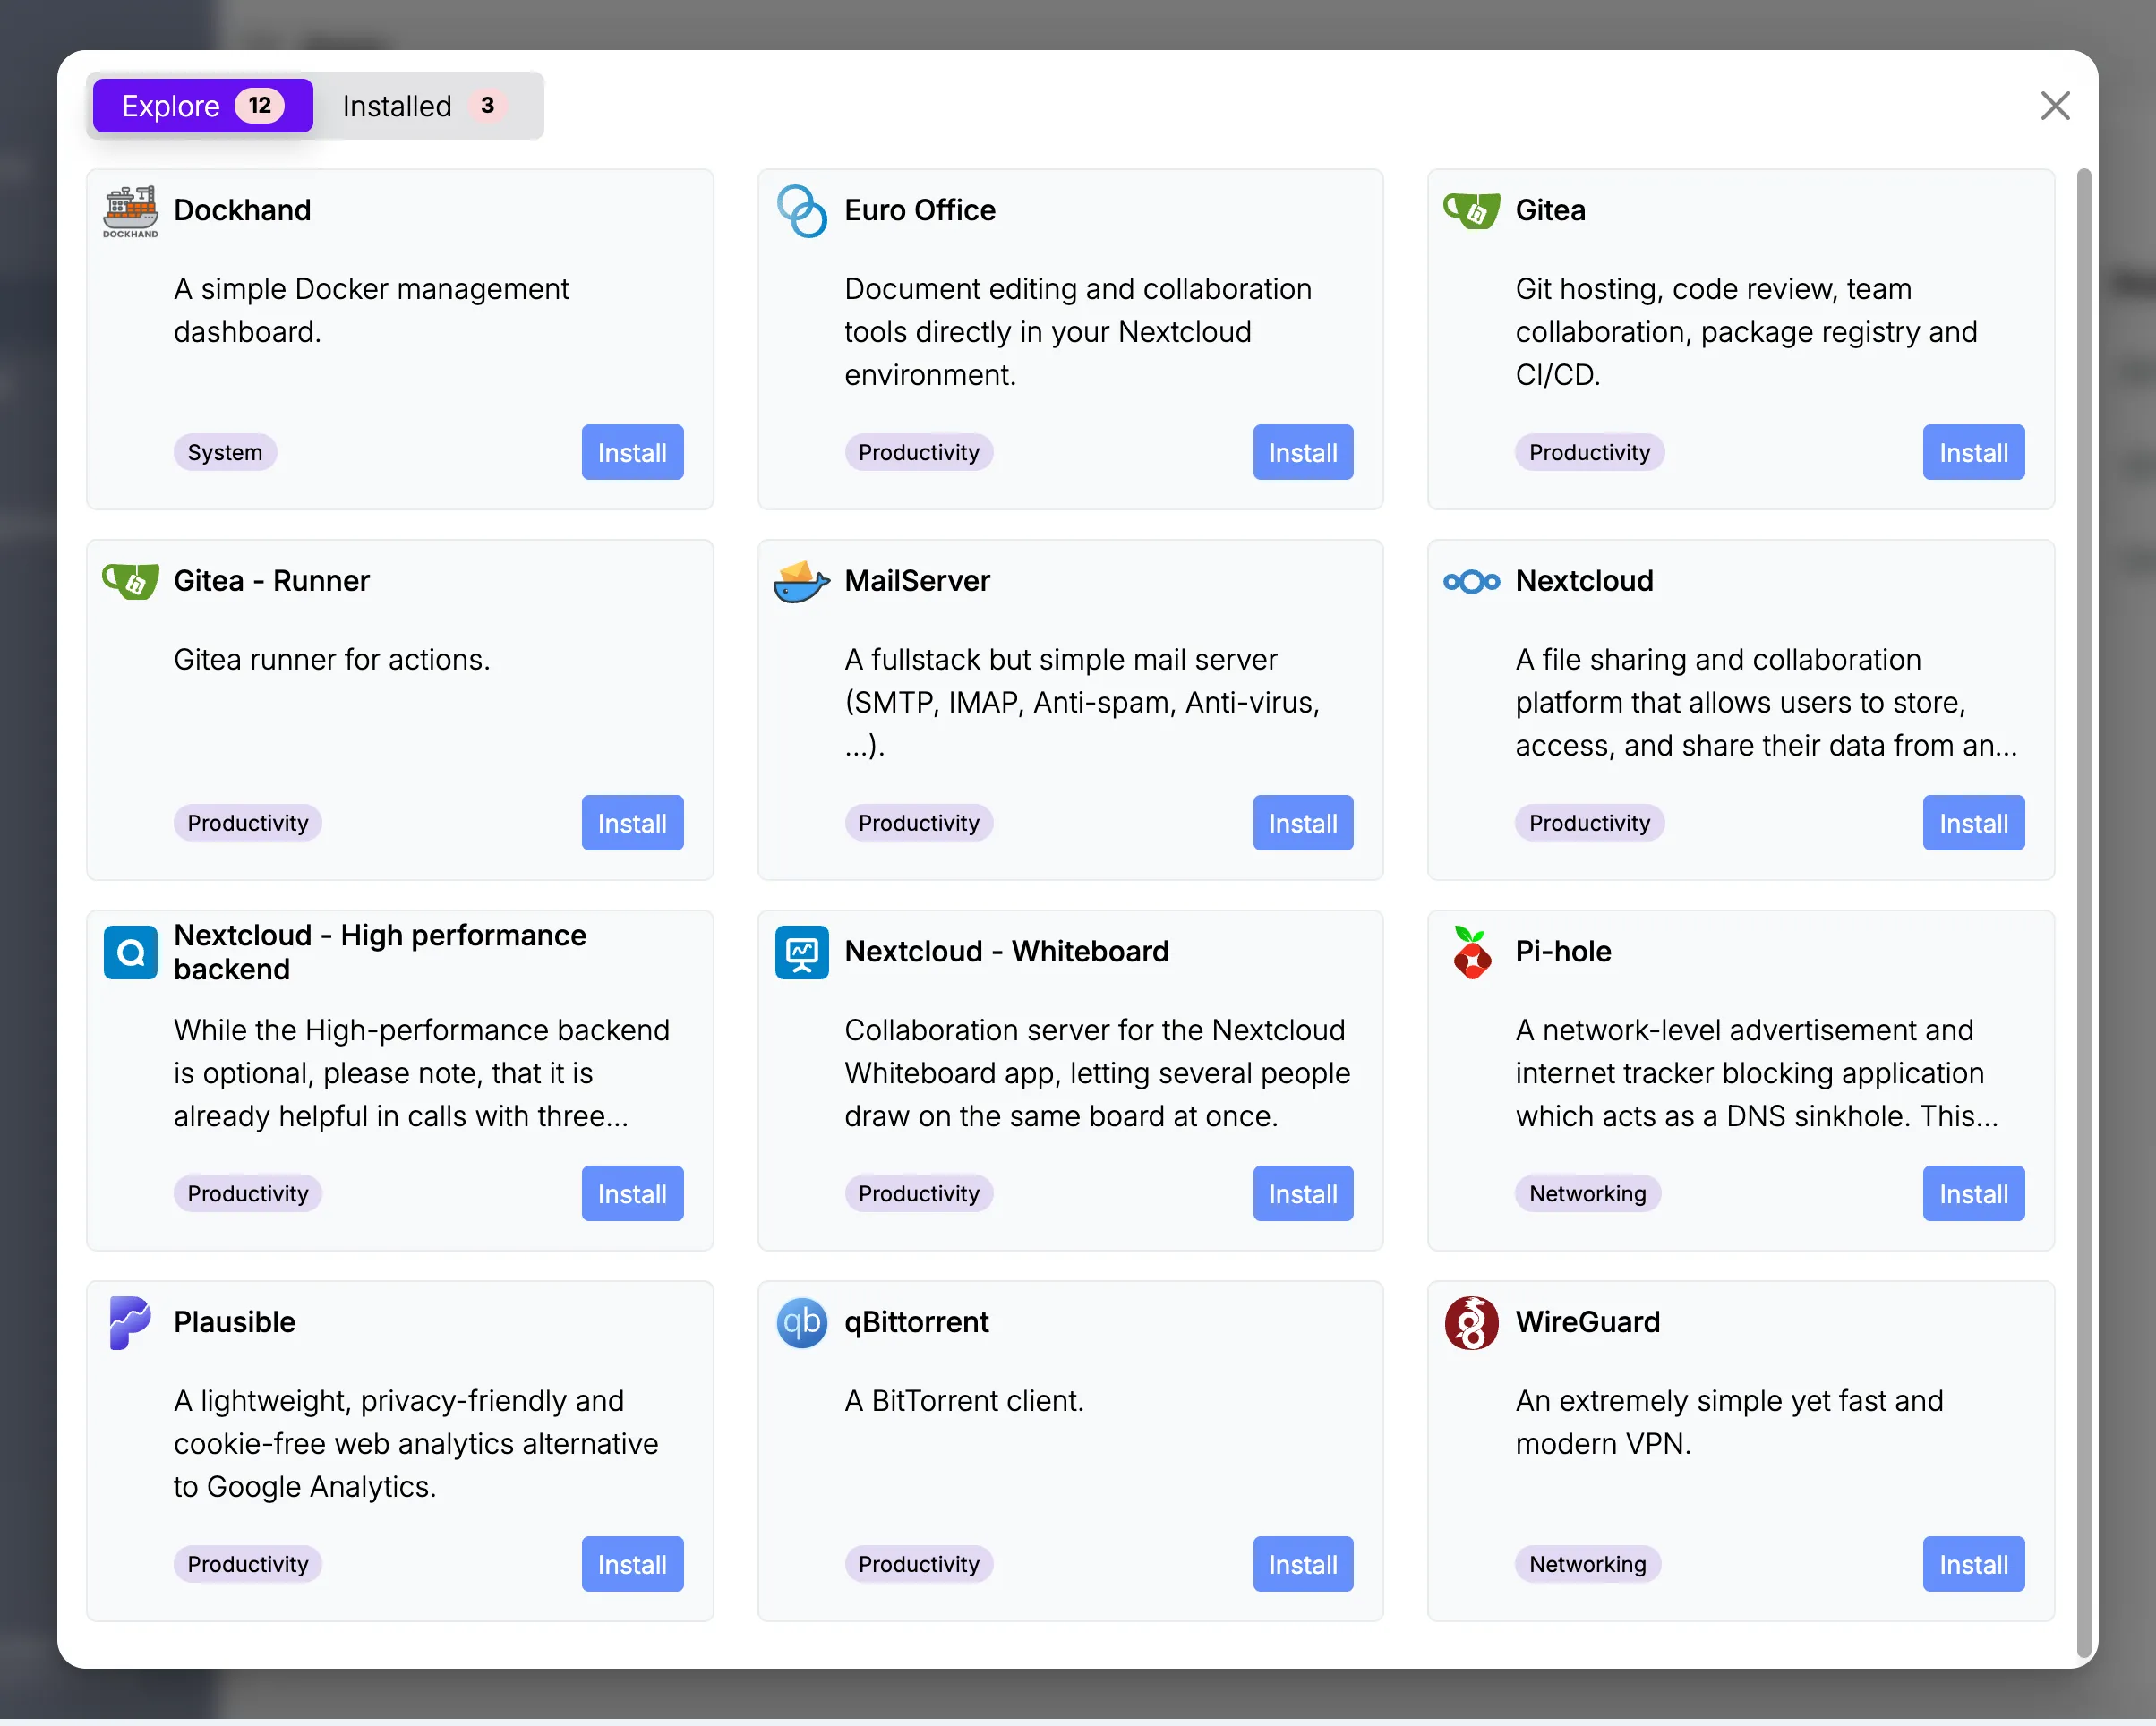
Each app keeps its data on the pool and is reached at its own name under the node’s domain.
Managed from anywhere
Registering a node connects it to your fleet account at fleet.univrs.cloud. The node connects out to the fleet itself, so you can manage it from anywhere, even when it sits behind CGNAT with no public IP address and no forwarded ports.
That covers managing the node. Reaching what runs on it is different: email, sharing files from Nextcloud with other people, the VPN and opening the apps from outside your local network all need an internet connection with a public IP address and a few ports forwarded on your router. Without them, the apps work only inside your local network.
Where to go next
- The installer images are on the releases page.
- The documentation covers setup, every management page and the
virgocommand. - The source is at github.com/univrs-cloud, under the GNU General Public License, version 2.